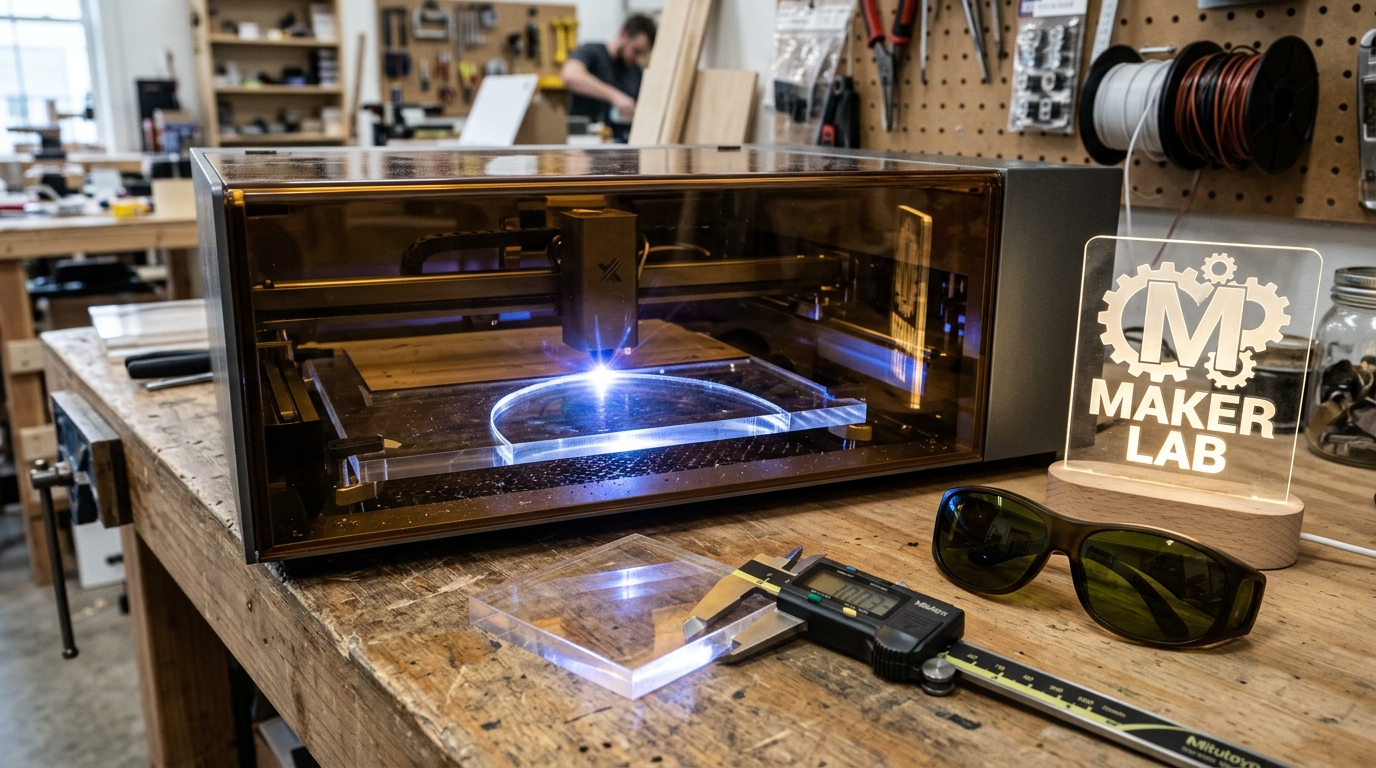
Cutting and engraving acrylic sheets on a desktop laser appears deceptively simple in promotional videos. A focused beam glides across a sheet of plastic, leaving behind a perfectly transparent, glass-like edge and crisp, frosted white letters. In an actual workshop environment, however, acrylic is one of the most unforgiving materials you can feed into a laser cutting machine.
Choose the wrong laser wavelength, and a 40W beam will pass straight through a transparent sheet without leaving a single mark while scorching the sacrificial honeycomb tray underneath. Turn your air assist compressor up too high, and your cut edge will develop frosty, rippled striations instead of an optical flame polish. Use extruded sheets instead of cast stock, and your vector cuts will turn into a gummy mess that re-welds itself together before you can lift the workpiece from the bed.
Over the past three months, we ran more than 60 hours of controlled cutting and engraving trials on clear, tinted, and opaque polymethyl methacrylate (PMMA) sheets ranging from 2 mm to 10 mm in thickness. We compared optical absorption physics across desktop CO2 tubes and high-power blue diode modules to establish verified feed rates, focal height offsets, and edge-quality benchmarks.
Laser Wavelength Physics: Why Diode and CO2 Beams Behave Radially Differently
The primary factor determining whether an acrylic laser cutter can cut transparent material is not raw wattage, but the optical emission wavelength of the laser source relative to the molecular transmission window of PMMA.
Optical Absorption Principle: Pure polymethyl methacrylate is chemically engineered for maximum visible light transmission between 400 nm and 700 nm. Standard blue semiconductor diode lasers emit at approximately 450 nm to 455 nm. Because this wavelength sits directly inside the material’s peak transparency window, over 92 percent of the blue optical energy transmits straight through clear acrylic without interacting with the polymer chains. In contrast, carbon dioxide (CO2) gas lasers emit in the deep infrared spectrum at 10,600 nm (10.6 microns). At 10,600 nm, PMMA exhibits near-total optical opacity, absorbing 100 percent of the photon energy within the first few microns of the surface and vaporizing the plastic cleanly.
| Laser Source Architecture | Typical Optical Wavelength | Clear / Transparent Acrylic | Opaque Black / Dark Acrylic | Mirrored Backing Acrylic | Primary Cutting Mechanism |
|---|---|---|---|---|---|
| CO2 Sealed Gas Tube | 10,600 nm (Far Infrared) | Cuts flawlessly with flame-polished edge | Cuts cleanly with high optical efficiency | Cuts from front or back without ghosting | Direct molecular vaporization |
| High-Power Diode (20W - 40W) | 450 - 455 nm (Blue Diode) | Physical transmission (Cannot cut) | Cuts well (Pigment absorbs blue beam) | Cuts only from coated backside | Thermal pigment conduction |
| Pulsed Fiber / Infrared | 1,064 nm (Near Infrared) | Passes through without thermal transfer | Minimal surface foaming or melting | Marks metal coating, cannot slice core | Surface electron interaction |
If your workshop roadmap involves cutting transparent acrylic signage, LED night-light bases, architectural models, or display vitrines, a desktop CO2 laser machine—such as the OMTech K40+ 45W or the commercial-grade xTool P2S 55W CO2 laser—is technically mandatory. If your budget only allows for an open-frame diode machine, your acrylic work will be strictly limited to opaque black, dark red, and dark green sheets that contain organic dyes capable of capturing 455 nm light.
Material Chemistry: Cast (GS) vs Extruded (XT) Acrylic
Before adjusting laser power and feed rates in LightBurn, you must verify the manufacturing method of your raw stock. Acrylic sheet stock is sold in two distinct chemical grades that react in opposite ways under a laser beam.
1. Cast Acrylic (Cell Cast / GS)
Cast acrylic is manufactured by pouring liquid methyl methacrylate monomer between two sheets of optical-grade glass and polymerizing it inside a thermal autoclave. This process yields long, interlocking polymer chains with high molecular weight.
- Laser Engraving Characteristics: When hit with a focused beam, cast acrylic sublimates into monomer vapor without going through a long liquid phase. The rapid micro-fracturing of the surface leaves behind a clean, frost-white, chalky contrast. It is the premier choice for engraved trophies, illuminated edge-lit LED signs, and personalized plaques.
- Vector Slicing Characteristics: The cut edge self-levels due to surface tension, forming an optical, flame-polished surface free of burrs.
2. Extruded Acrylic (Continuous Drawn / XT)
Extruded acrylic is produced by pushing molten pellets through mechanical rolling dies. This results in shorter polymer chains and lower tensile strength, but significantly tighter sheet thickness tolerances.
- Laser Engraving Characteristics: Instead of turning frosty white, extruded acrylic melts into a gummy, translucent grey groove with uneven raised edges. It looks smeary under direct lighting and is poorly suited for decorative raster engraving.
- Vector Slicing Characteristics: While it cuts slightly faster than cast stock at identical wattages, the kerf stays molten longer. If your parts sit tightly nested on the honeycomb bed, the molten edges can fuse back together behind the moving laser head.
| Performance Attribute | Cast Acrylic (Cell Cast / GS) | Extruded Acrylic (Continuous Drawn / XT) |
|---|---|---|
| Sheet Thickness Consistency | Variable (Typically plus or minus 8 to 12 percent) | Extremely consistent (Within plus or minus 0.1 mm) |
| Raster Engraving Visual Quality | Bright frosted white, high contrast | Dull translucent grey, melted edges |
| Flame-Polished Edge Quality | Flawless glass-smooth finish | Smooth, but prone to edge chipping under stress |
| Gummy Re-Welding Risk | Minimal | High if air flow is insufficient |
| Material Cost per Square Foot | 15 to 25 percent higher | Lower baseline cost |
| Recommended Primary Use | Awards, edge-lit night lights, retail displays | Structural boxes, machine guards, spacers |
Workshop Benchmark Matrix: Cutting Speeds and Edge Quality
To establish baseline settings, we ran test grids through 3 mm, 5 mm, and 10 mm cast acrylic sheets using both a 45W CO2 laser and a 40W diode laser on opaque black stock. The kerf measurements were recorded using digital calipers across five sample cuts.
| Material Thickness and Color | Machine Type and Output | Tested Power Setting | Travel Feed Rate | Single Pass Result | Measured Kerf Width | Edge Surface Finish |
|---|---|---|---|---|---|---|
| 3.0 mm Clear Cast | 45W CO2 (OMTech K40+) | 75 percent (Approx. 34W) | 380 mm/min | Clean complete drop | 0.18 mm | Mirror flame polish, zero burr |
| 3.0 mm Clear Cast | 55W CO2 (xTool P2S) | 70 percent (Approx. 38W) | 480 mm/min | Clean complete drop | 0.16 mm | Optical glass clarity |
| 3.0 mm Opaque Black | 40W Diode (455 nm) | 90 percent (36W) | 240 mm/min | Clean complete drop | 0.14 mm | Slight micro-striations, semi-gloss |
| 5.0 mm Clear Cast | 45W CO2 (OMTech K40+) | 85 percent (Approx. 38W) | 190 mm/min | Clean complete drop | 0.22 mm | Polished, minimal taper |
| 5.0 mm Clear Cast | 55W CO2 (xTool P2S) | 80 percent (Approx. 44W) | 250 mm/min | Clean complete drop | 0.19 mm | Optical clarity, vertical wall |
| 5.0 mm Opaque Black | 40W Diode (455 nm) | 100 percent (40W) | 85 mm/min (2 passes) | Separation achieved | 0.28 mm | Visible step line, dull matte edge |
| 10.0 mm Clear Cast | 55W CO2 (xTool P2S) | 95 percent (Approx. 52W) | 75 mm/min | Clean complete drop | 0.31 mm | High gloss, slight vertical taper |
| 10.0 mm Opaque Black | 40W Diode (455 nm) | 100 percent (40W) | Ineffective | Failed cut / charring | Not applicable | Excessive melting and smoke flame-up |
Air Assist Tuning Secret: When cutting wood on an enclosed machine like the WeCreat Vision Pro 45W, operators typically maximize air assist pressure to 30 PSI to blow away carbon char. On acrylic, high-pressure airflow is counterproductive. High-velocity air cools the liquid kerf prematurely, locking in turbulent ripples and leaving a frosty, matte edge. To achieve a crystal-clear, mirror-smooth flame polish, drop air assist pressure down to a gentle whisper (5 to 8 PSI). The minimal airflow protects the optical lens from vapor condensation while allowing the cut surface to remain molten long enough for surface tension to pull it into a mirror finish.
Protective Masking, Lens Maintenance, and Fume Extraction
Achieving consistent results on acrylic requires adhering to three fundamental shop protocols that are often overlooked:
1. Paper Masking vs Plastic Film
Most acrylic sheets ship from the mill with either a blue polyethylene protective film or a brown kraft paper adhesive backing.
- Always peel off plastic film before cutting. Thin polyethylene melts under the laser beam, releasing sticky black slag that adheres to the top face of the acrylic and leaves permanent chemical burns.
- Paper masking can remain in place during cutting. It catches smoke stains and flare-ups, peeling away cleanly to expose pristine plastic underneath.
- For raster engraving on cast acrylic, peel the paper masking off the engraved face completely. Leaving paper on during raster engraving causes localized charring and traps charred adhesive inside the fine text crevices.
2. Optical Lens Clouding from PMMA Vapors
When acrylic vaporizes, it produces methyl methacrylate monomer gas. As this gas cools, it condenses back into an oily microscopic film on cool optical surfaces. If your machine’s exhaust airflow is sluggish, this residue will coat the focal lens within 2 hours of continuous cutting.
Once the lens is clouded, it absorbs the laser energy rather than transmitting it, causing thermal shock that can crack expensive ZnSe or quartz optics. Inspect and clean your focal lens with 99 percent isopropyl alcohol and optical lens tissue before every production run.
3. Fume Extraction and VOC Management
Unlike timber, which smells like an open campfire when cut (as detailed in our guide on the best wood for laser cutting), vaporized PMMA smells acutely sweet and chemical. Breathing concentrated methyl methacrylate fumes causes rapid nausea, headaches, and eye irritation.
Operating an acrylic laser cutter indoors without negative-pressure venting directly outside or through a sealed filter system—such as an upgraded 113700 main filter with carbon mix—is unacceptable for workplace safety.
Machine Selection Guide: Which Acrylic Laser Cutter Fits Your Workshop?
Selecting the right equipment comes down to your production volume, sheet dimensions, and material transparency requirements:
Best for Small-Scale Clear Acrylic Displays and Signage
If your core output includes personalized edge-lit LED acrylic signs, cake toppers, jewelry, and ornaments up to 5 mm thick, a compact desktop CO2 unit like the OMTech K40+ 45W provides the required 10,600 nm wavelength at the lowest barrier to entry. It fits onto a standard 30-inch workbench and cuts 3 mm cast acrylic cleanly at 380 mm/min.
Best for Production Workshops and Commercial Small Businesses
For workshops manufacturing 6 mm to 10 mm structural acrylic assemblies, retail display vitrines, or nesting full sheets of 24 × 12 inch stock, stepping up to an enclosed 55W CO2 laser like the xTool P2S or checking our comparative breakdown of the best laser cutter for small business is the professional path. Dual smart cameras handle curved-surface mapping, while the automatic passthrough slot accommodates oversized acrylic panels.
Best for Hobbyists Exclusively Working with Dark Opaque Sheets
If you already operate an open-frame 20W or 40W diode cutter, you do not need to replace your rig immediately if you only cut black, dark navy, or dark green decorative faceplates. By purchasing genuine cell cast black acrylic and setting LightBurn to 90 percent power at 240 mm/min, you can achieve clean geometric cuts without purchasing a high-voltage CO2 tube.
You can verify real-time pricing and accessory bundle packages directly on Amazon:
- Check Current Price on Amazon for Desktop CO2 Laser Cutters
- Check Current Price on Amazon for Enclosed Smart Laser Cutters
(Note: We earn a small affiliate commission if you purchase through our links, which helps us fund lab consumables and independent workshop testing.)
Frequently Asked Questions About Acrylic Laser Cutting
Can a 10W or 20W diode laser cut clear acrylic if I paint the surface black?
No. While coating clear acrylic with black tempura paint, dry-erase marker, or laser marking paper allows the 450 nm blue beam to absorb heat at the very top surface layer, the beam will stop cutting the moment it penetrates past the black ink coating. As soon as the beam enters the clear core, transmission resumes and cutting halts, resulting in surface blistering, severe pitting, and scorched edges rather than a clean cut.
Why do my laser-cut acrylic pieces crack weeks after being assembled?
This phenomenon is known as solvent-induced stress cracking or crazing. When an intense laser beam vaporizes PMMA, the rapid localized heating and cooling introduces significant residual tensile stress along the cut perimeter. If you subsequently wipe the edges with chemical cleaners like isopropyl alcohol, Windex, or cyanoacrylate superglue, the solvent penetrates the micro-fissures and causes spiderweb cracking across the entire edge within hours. Always clean laser-cut acrylic with mild dish soap and warm water, or flame-anneal the parts in a temperature-controlled oven at 80 degrees Celsius for two hours after cutting.
What is the thickest acrylic a 45W to 55W CO2 laser can realistically cut?
In single-pass production cutting where edge verticality matters, a 45W tube comfortably cuts up to 8 mm clear cast acrylic, while a 55W tube cleanly handles 10 mm to 12 mm stock. While cutting 15 mm or 20 mm is technically possible at 30 mm/min with a long focal length lens (such as a 2.5-inch or 4.0-inch lens), the extended exposure time causes thermal blooming, visible edge taper, and an increased risk of localized ignition on the honeycomb bed.