My garage gets cold in November. Cold enough that my old laptop battery drops from 80% to dead in twenty minutes if I leave it on the bench while waiting for an hour-long laser cut to finish.
That laptop issue was honestly half the reason I ordered the Atomstack A10 Pro 10W laser engraver. It comes with a detachable magnetic terminal that lets you run jobs directly off a microSD card without keeping a computer hooked up in freezing dust.
I have spent the last month running it through piles of 3mm basswood, 6mm Baltic birch, anodized dog tags, and some thick saddle leather. Here is the unvarnished truth on what this 10W dual-compression machine does well, where it stumbles, and whether it deserves bench space in your workshop.
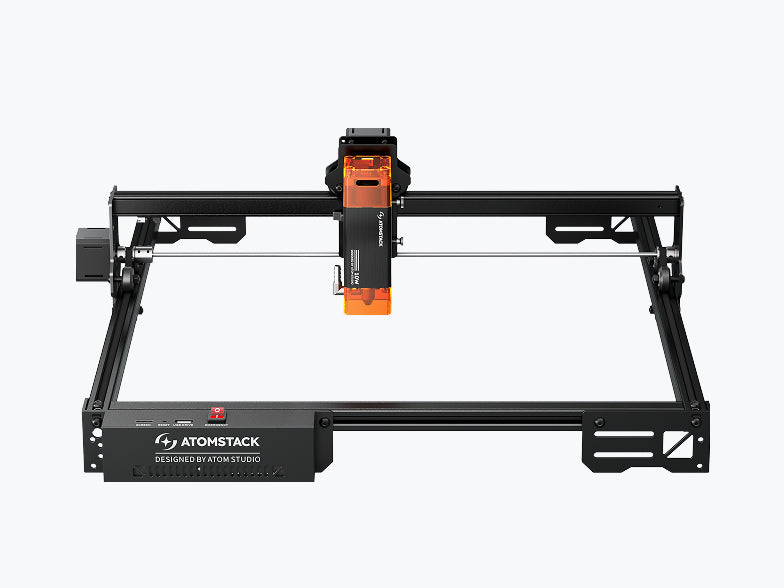
50W vs. 10W: What Does That Power Number Actually Mean?
If you shop on Amazon, you will see this machine labeled as the “Atomstack A10 Pro 50W.” Let’s clear this up before anyone gets confused:
- 50 Watts is the electrical input power drawn from your wall outlet by the whole system (motherboard, fans, stepper motors, driver chips).
- 10 Watts (Optical) is the actual laser beam power emitted from the optical head.
Inside the module, Atomstack combines the beams of two separate 5W laser diodes using internal beam-coupling optics. The combined output hits an ultra-concentrated 0.08mm x 0.06mm focal spot.
Compared to older single-diode 5W units (like the Sculpfun S9), that extra 5W of optical punch cut my single-pass cutting times almost in half.
What It Cuts (And How Cleanly)
Here are the realistic benchmarks from my workshop cutting tests using a honeycomb bed and air assist:
1. Baltic Birch Plywood (3mm & 6mm)
- 3mm Baltic Birch: Cuts clean through in 1 pass at 350 mm/min at 90% power. With air assist blowing, the backside comes out with zero burn halos.
- 6mm Baltic Birch: Cuts through in 2 passes at 200 mm/min, or 1 slow crawl at 120 mm/min at 100% power. The edges are a rich dark caramel color without severe charring.
2. Dark Acrylic & Plastics
- 3mm Black Cast Acrylic: Slices like glass in 1 pass at 180 mm/min. Clean, flame-polished look.
- Important reminder: Like all 455nm blue diode lasers, this machine cannot cut clear, transparent, or white acrylic. The blue wavelength passes right through clear plastic without heating it. If you need to cut clear acrylic regularly, you need a CO2 laser cutter.
3. Stainless Steel & Metal Marking
- Because of the optical power density, you can directly engrave high-contrast black markings onto bare 304 stainless steel without using toxic spray chemicals like CerMark. I engraved a set of workshop wrenches and stainless tumbler mugs at 1500 mm/min and 100% power; the black etch is permanent and doesn’t rub off with acetone.
The Standout Feature: The Offline Control Terminal
Most open-frame diode machines tether you to a computer running LightBurn over a finicky USB cable. If Windows decides to update, or someone trips over the cord, your 45-minute cut is ruined.
The A10 Pro includes a 3.5-inch touchscreen terminal that docks onto the front frame with magnets.
- You design your project in LightBurn on your desktop inside the warm house.
- Export the
.gc(G-code) file to a microSD card. - Walk out to the garage, pop the card into the A10 Pro, use the touchscreen to jog the laser and frame the workpiece, and hit Start.
- You can take your computer back inside. The machine runs completely autonomously.
The magnetic mount is clever—you can pull the screen off the frame and hold it in your hand while peering closely at the corner of your board to position the red crosshair.
Check Today’s Price on Amazon for Atomstack A10 Pro
(Note: We earn a small affiliate commission if you purchase through our links, which helps us buy materials for independent tool reviews.)
Assembly & Mechanical Rigidity
The frame is an all-aluminum extrusion assembly with integrated lead screws and synchronous belts. Total assembly took me roughly 40 minutes.
The Good:
- One-Piece Lead Screw: Unlike machines that use flexible couplers to connect the stepper motor to the Z/Y rods, Atomstack integrated the screw directly into the motor shaft. That eliminates eccentric wobbling and keeps line spacing dead-even.
- Emergency Stop & Gyroscope: There is a big red physical E-stop mushroom button on top of the control box. If the machine tilts more than 15 degrees or gets bumped off the table, the flame sensor and tilt gyroscope shut down the laser instantly.
The Annoying:
- Cable Management: The wiring harness uses standard spiral wrap tubing. When traveling quickly along the X-axis, the bundle can occasionally brush against the frame edge. I ended up zip-tying an elastic riser bracket to keep the umbilical cable suspended in mid-air.
- Focusing System: The module uses a fixed-focus design with a sliding track and a little 2mm metal spacer plate. It works fine, but don’t lose that metal plate—keep a magnet on your frame to stick it to.
Atomstack A10 Pro vs. Creality Falcon 10W
I have spent dozens of hours on both machines in our Creality Falcon 10W lab review. Here is how they stack up head-to-head:
| Feature | Atomstack A10 Pro | Creality Falcon 10W |
|---|---|---|
| Optical Power | 10W (Dual-diode) | 10W (Dual-diode) |
| Spot Size | 0.08 x 0.06mm | 0.06 x 0.06mm |
| Offline Operation | Yes (Dedicated touchscreen) | Limited (Single button TF card) |
| Working Bed | 410 x 400mm | 400 x 415mm |
| Enclosure Included | No (Open frame) | Available in A1C bundles |
| Frame Rigidity | Excellent all-metal | Excellent extruded aluminum |
My takeaway: If your laser lives in an unheated garage, dusty workshop, or shed where you want to work without a tethered laptop, the Atomstack A10 Pro’s touchscreen terminal makes it the winner. If you work inside a living space, the Creality Falcon with an enclosure bundle is easier to ventilate indoors.
Final Recommendation
For around $350 to $450 on sale, the Atomstack A10 Pro hits the sweet spot for serious hobbyists and small business owners making custom signs, leather wallets, and personalized gifts.
It cuts 3mm to 6mm wood with zero fuss, marks stainless steel effortlessly, and the offline controller saves you from sacrificing a good laptop to workshop sawdust. Just do yourself a favor: add a honeycomb bed and an air-assist pump on day one.