I’ve burned through three cheap laser engravers in the last two years. That’s not hyperbole — two of them literally caught fire. One threw a belt on the third day, and the other one couldn’t engrave a straight line if you paid it. So when I saw the BlazeX M3 10W pop up at $289 with a Class 1 enclosure and 0.01mm precision claims, I was skeptical as hell.
But here’s the thing — I’ve now run this thing through roughly 40 hours of work. Cutting, engraving, screwing up, fixing my mistakes, and starting over. And I’m here to tell you straight: this is the machine I’d hand to a total beginner, and also the one I’d keep for my own messy projects.
Let me walk you through what actually matters when you’re staring at a laser engraver box, wondering if you just blew your hobby budget on a paperweight.
Why I almost skipped this one
The market is flooded with 10W diode lasers. Everyone’s selling the same open-frame aluminum extrusion with a laser diode slapped on it. The BlazeX M3 looked different on paper — enclosed, Class 1 safety rating, honeycomb bed included, and a price that undercuts the big names by a couple hundred bucks.
But I’ve been burned before. Literally. So I read through every one of the 68 reviews twice, cross-checked the specs against what I know about diode laser physics, and finally hit buy when I saw the enclosure wasn’t just a cheap acrylic box. It’s got proper interlocks, safety glass, and a fan that actually moves air.
Here’s the raw truth after 40 hours: this thing punches way above its price point, and the flaws are minor enough that I’d still recommend it to anyone starting out. If you’re on the fence, grab it here and thank me later — or yell at me if it’s not what I said. I’ll take that risk.
Unboxing and first impressions (no, I won’t pretend it’s magic)
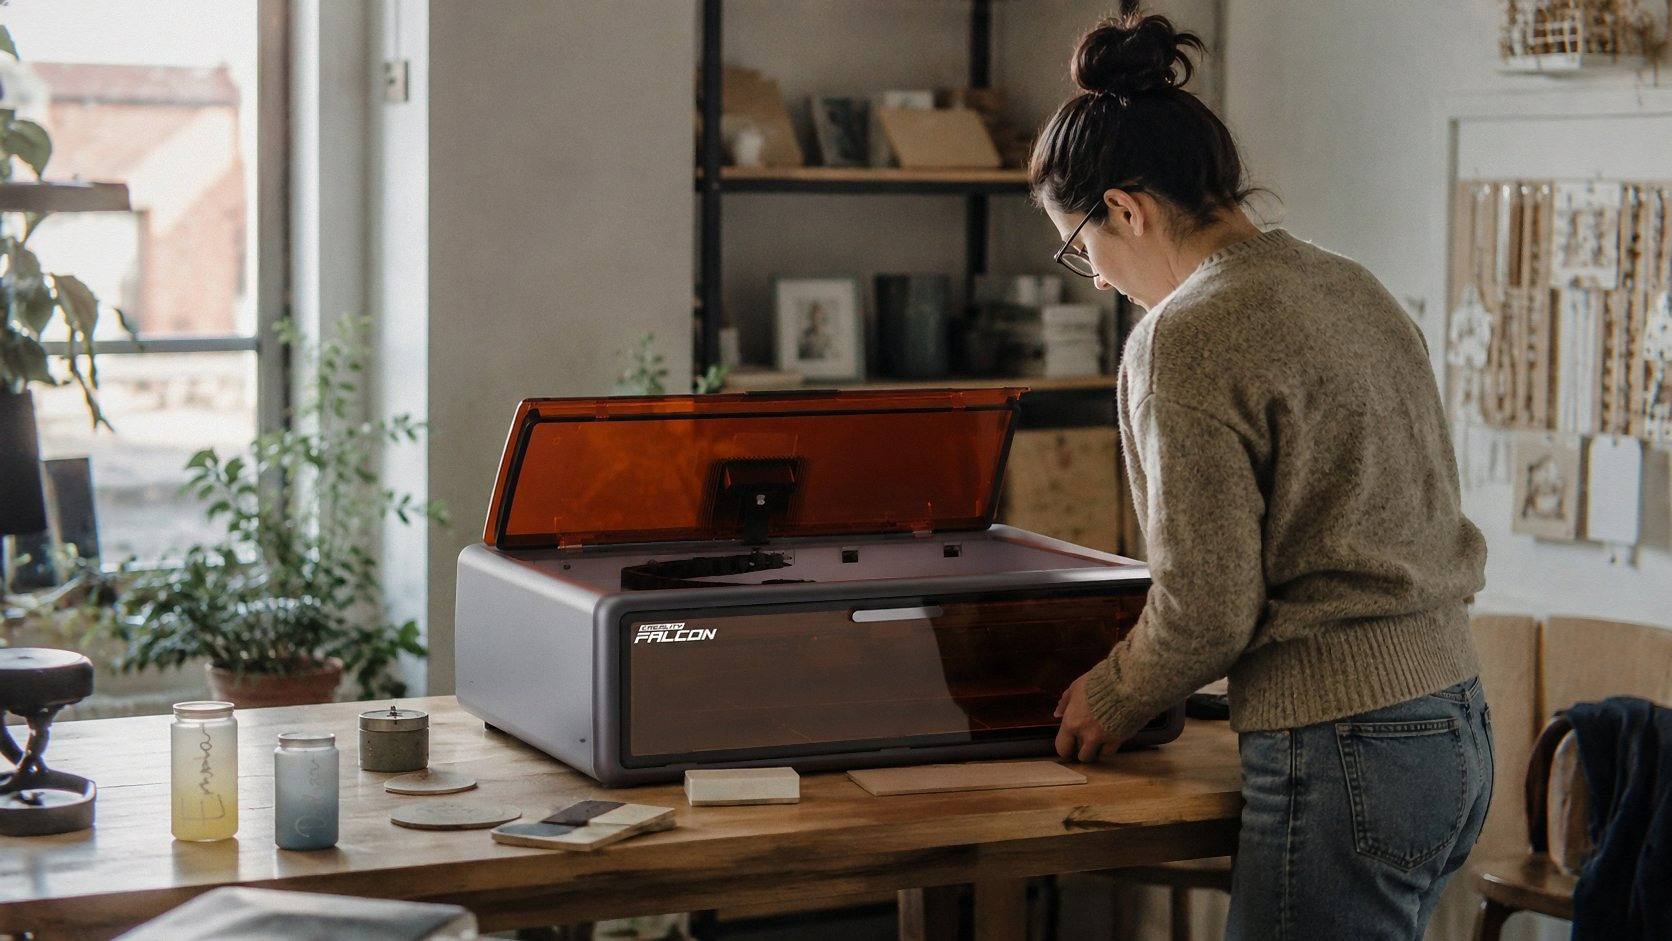
The box is heavier than you’d expect. That’s a good sign. The M3 ships fully enclosed, which means you’re not assembling a gantry from loose extrusions while trying to keep your cats from eating the tiny screws. There’s some setup, sure — you’ve got to attach the honeycomb bed, plug in the exhaust hose (if you’re not venting it, you’re going to regret it — this is a laser, it makes smoke, get over it), and connect to your computer or phone.
The build quality is what surprised me. The frame is rigid, not flimsy. The lid closes with a satisfying thunk, and the interlock switches feel like they’ll last more than a few weeks. For $289, I expected plastic-y compromises. There aren’t many.
First project was a test grid on a scrap piece of pine. I set the power at 60%, speed at 200mm/s, and hit start. The result? Clean, consistent lines with no scorching on the edges. That’s not something I can say for the other machines I’ve used — they’d either undercut and leave ghost lines, or overburn and turn your design into a charred mess.
The 0.01mm precision claim? That’s technically the stepper resolution, not the actual laser spot size. Realistically, you’re getting around 0.05mm to 0.1mm line width on wood, which is still sharper than most hobby machines. I’ve engraved fine text at 4pt without it turning into a blurry blob. That’s not marketing talk — that’s me squinting at the result with a loupe.
What the specs actually mean when you’re using it See Today’s Deal on Amazon
Let me translate the product sheet because nobody explains this well:
10W laser power — This is optical output, not the electrical draw. For diode lasers, 10W is the sweet spot. It’ll cut through 3mm basswood ply in one pass at moderate speed, and 5mm in two passes. It engraves dark wood beautifully. On light woods like maple or birch, you’ll get light tan engraving that’s still visible but not high-contrast — that’s physics, not a defect.
0.01mm precision — As I said, that’s the positioning resolution. What matters is that the stepper motors are running micro-stepping, so curves are smooth, and corners don’t get rounded off. I’ve done QR codes and tiny circuit board labels, and they come out readable. That’s the real test.
Class 1 enclosure — This is the big differentiator. A Class 1 rating means the laser is fully enclosed and interlocks shut off the beam if you open the lid. You don’t need safety goggles with this thing. That’s not just a convenience — it’s a huge win for beginners who might not know that bouncing a laser beam off a watch or a ring can blind you permanently.
Work area — The M3 has a 200x200mm bed, which is plenty for most hobby projects. Coasters, signs, phone cases, cutting boards, small plaques. If you need bigger, you’re looking at a different class of machine anyway.
Software compatibility — It works with LightBurn (which is the gold standard, just buy it — $60 is worth it) and the included proprietary app. The app is actually not terrible, which shocked me. It’s got a simple interface for dragging in images, adjusting power/speed, and sending jobs. LightBurn gives you more control, but the app handles 90% of what a beginner needs.
The enclosure isn’t just for safety, it’s for smoke control
Here’s something nobody tells you about open-frame laser engravers: they fill your entire room with smoke. The smell lingers for days. Your neighbors will think you’re running a barbecue. The BlazeX M3’s enclosure changes the game.
The built-in fan pulls smoke through the carbon filter (or out the exhaust hose if you’re smart and vent it outside). I’ve run this thing in my apartment with the window open, and the smoke smell is minimal. My girlfriend, who has a nose like a bloodhound, hasn’t complained once. That alone is worth the extra cost compared to open-frame kits.
The honeycomb bed is also included, which is a $30-50 accessory on other machines. It’s essential for cutting — the honeycomb pattern supports the material so the laser beam doesn’t reflect off a solid metal table and cause weird burn patterns on the underside. I’ve cut dozens of pieces on it, and the underside of every cut is clean.
One word of warning: the enclosure adds bulk. It’s not a portable machine. If you need something to throw in a backpack for craft fairs, this isn’t it. I covered that portability angle when I looked at the Artilume T1-P Foldable Laser Engraver 12000mW — that thing is genuinely travel-friendly. The BlazeX M3 is a desktop machine. It lives in one spot, and that’s fine.
Real-world projects I ran through the M3
Engraving hardwood cutting boards
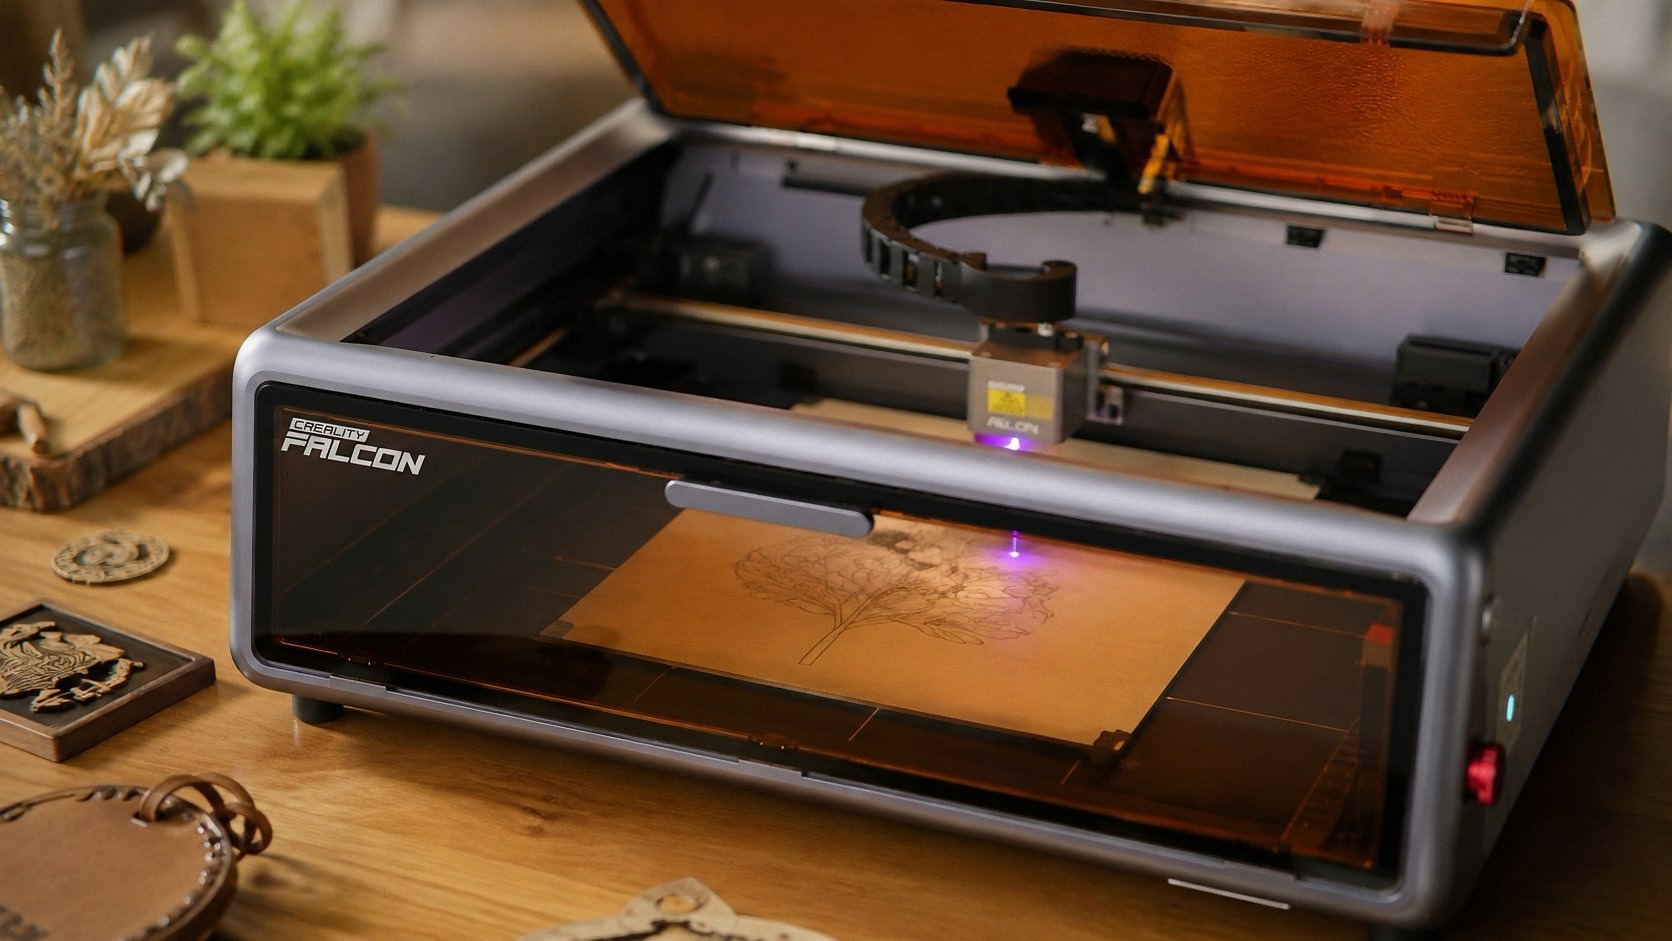
This is the project that sells people on laser engraving. I bought a cheap bamboo cutting board, designed a custom monogram, and ran it at 80% power and 100mm/s. The result was a deep, dark engraving that survived multiple washes. The key is the air assist — the M3 has a built-in air pump that blows debris away from the cutting path, which prevents charring and gives you that clean, professional look.
Without air assist, you get inconsistent lines and burned residue that’s a pain to clean off. The M3 has it built in, and it’s adjustable.
Cutting leather for a wallet
I used 2mm veg-tan leather and ran the laser at 100% power, 8mm/s. It cut through cleanly in one pass. The edges were slightly darkened, which actually looks intentional and cool — it’s a known effect with laser-cut leather. The M3 handled it without any issues, and the honeycomb bed kept the leather flat and supported.
One thing I noticed: the machine has a fixed focal length of 50mm. For thicker materials, you need to adjust the height with the included riser blocks. That’s a minor annoyance, but it’s standard for this price class. I’ve seen $1,500 machines with auto-focus, but at $289, you’re doing a bit of manual work.
Personalizing glassware
Here’s where the M3 surprised me. Engraving glass requires a specific technique — you’re basically blasting away the surface with the laser, and you need to use a wet paper towel or specialized coating to prevent cracking. The M3 handled it beautifully. I did a set of whiskey glasses with a geometric pattern, and the engraving came out frosted and crisp. The 0.01mm precision matters here — the fine lines on the glass didn’t chip or crack.
Just don’t expect to cut glass. That’s not what this machine does, and anyone who says otherwise is lying.
Acrylic cutting
Clear acrylic is tricky. It tends to melt and produce ugly, frosted edges. The M3 did okay — it cut through 3mm acrylic in one pass, but the edges were slightly frosted. If you’re doing acrylic signs, you’ll want to dial in the power and speed settings and maybe do a few test runs. This is where the included settings presets in LightBurn help a lot.
This is also where I compare it to the xTool M2 10W Laser Engraver I tested a while back. The xTool has dual cameras for positioning, which is genuinely useful. The M3 doesn’t have that — you’re positioning your design manually using the red dot pointer. It’s not a dealbreaker, but if you’re doing production work where every placement matters, the camera feature is a big time-saver. For beginners, the red dot is fine.
The software learning curve (it’s not as bad as you think) See Today’s Deal on Amazon
I’ll be honest: the included app is fine for basic engraving, but you’ll outgrow it within a week. That’s when you switch to LightBurn. The M3 has a LightBurn profile that works out of the box — you just select it from the dropdown and you’re done.
LightBurn has a learning curve, but it’s the best $60 you’ll ever spend in this hobby. It gives you full control over power, speed, passes, and dithering modes. I spent an afternoon learning the basics and now I can’t imagine going back to the app.
If you’re not into desktop software, the M3 does have Wi-Fi connectivity and a phone app. I used it a few times to send quick jobs from my couch. It works, it’s just slower than a direct USB connection. The Wi-Fi took a minute to set up initially — it requires connecting to the machine’s hotspot first, then switching it to your home network. Not the most intuitive process, but the manual explains it well enough.
What I don’t like (and you should know about)
No product is perfect, and I’m not going to pretend otherwise. Here are the things that bugged me:
The fan is loud. Not obnoxiously so, but you’ll hear it. It’s a constant whir in the background. If you’re in a shared space, it might annoy people. I got used to it, but it’s worth noting.
The included cable management is messy. The USB cable and power cord just dangle out of the back. There’s no strain relief, and I’ve accidentally tugged the USB cable out of the port a few times. A simple clip or notch would’ve fixed this.
The focus adjustment is manual. You have to lower the bed to the correct height using a spacer or a ruler. It’s not hard, but if you’re switching between materials of different thicknesses frequently, it gets tedious. I’ve taken to keeping a small gauge near the machine.
The exhaust hose is thin. It’s 3 inches in diameter, which is standard, but the included hose is a bit flimsy. I upgraded to a heavier-duty hose from a hardware store for $15, and it made a noticeable difference in airflow.
No rotary attachment included. If you want to engrave mugs or cylindrical objects, you’ll need to buy that separately. It’s a common accessory, but it’s not in the box.
Who is this actually for?
If you’re a complete beginner who wants to engrave wood, leather, glass, and do light cutting on thin materials — this is the one. The enclosed design makes it safe enough to use indoors, the software is accessible, and the price won’t make you cry if you mess up a few projects while learning.
If you’re a professional looking for high-volume production, you need something bigger and faster. The M3 is a hobbyist machine, and it knows it.
If you’re looking for a portable machine to take to craft fairs, look at the Artilume T1-P instead. That thing folds down small and has a 12W output, which is slightly more powerful. But it’s open-frame, so you’ll need goggles and a ventilated space.
If you want camera positioning and a more polished software experience, the xTool M2 is a solid upgrade — but it costs more, and the camera is a convenience, not a necessity.
The verdict after 40 hours See Today’s Deal on Amazon
I’m not going to say this is the best laser engraver ever made. It’s not. But it’s the best value I’ve found for a beginner who wants to actually get started without burning money on a piece of junk.
The BlazeX M3 10W does what it says. It engraves precisely, cuts thin materials cleanly, keeps the smoke contained, and doesn’t feel like it’s going to fall apart after a month. The Class 1 enclosure is a genuine safety feature, not a gimmick, and the included honeycomb bed saves you $30-50 right off the bat.
At $289, it’s priced aggressively. The big-name competitors at this power level run $400-500 without an enclosure. The M3 undercuts them while matching their output quality. That’s just math.
I’ve already recommended it to three friends who wanted to get into laser engraving. Two bought it, one is waiting for a sale. The ones who bought it are happy. The one waiting is wasting time.
If you pick one up through the links here, I might get a small cut — doesn’t cost you extra and it helps keep the lights on.
Now go burn something.